-
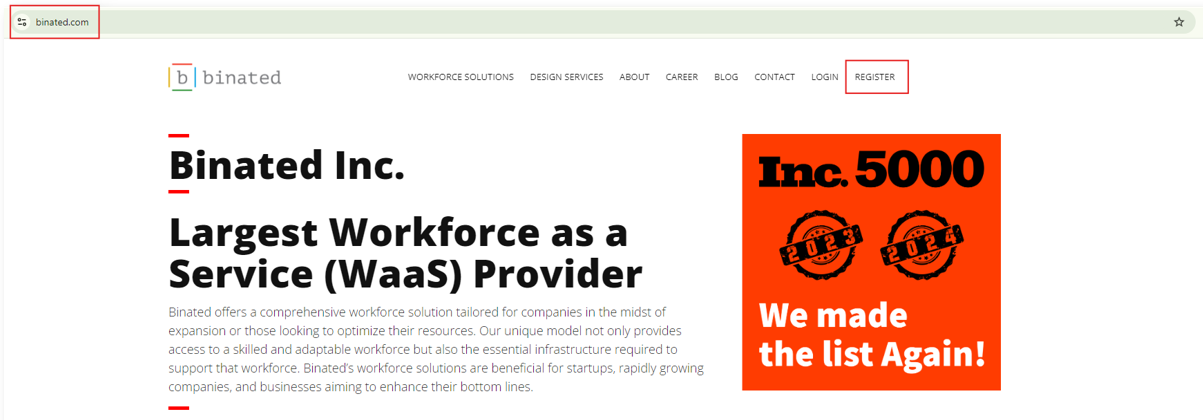
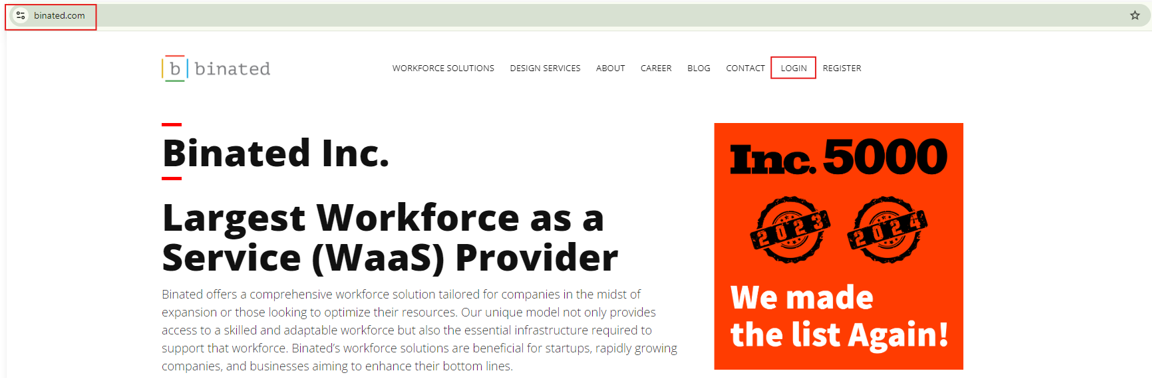
Visit Bianted.com
-
Click on the "Register" button located at the top-right corner
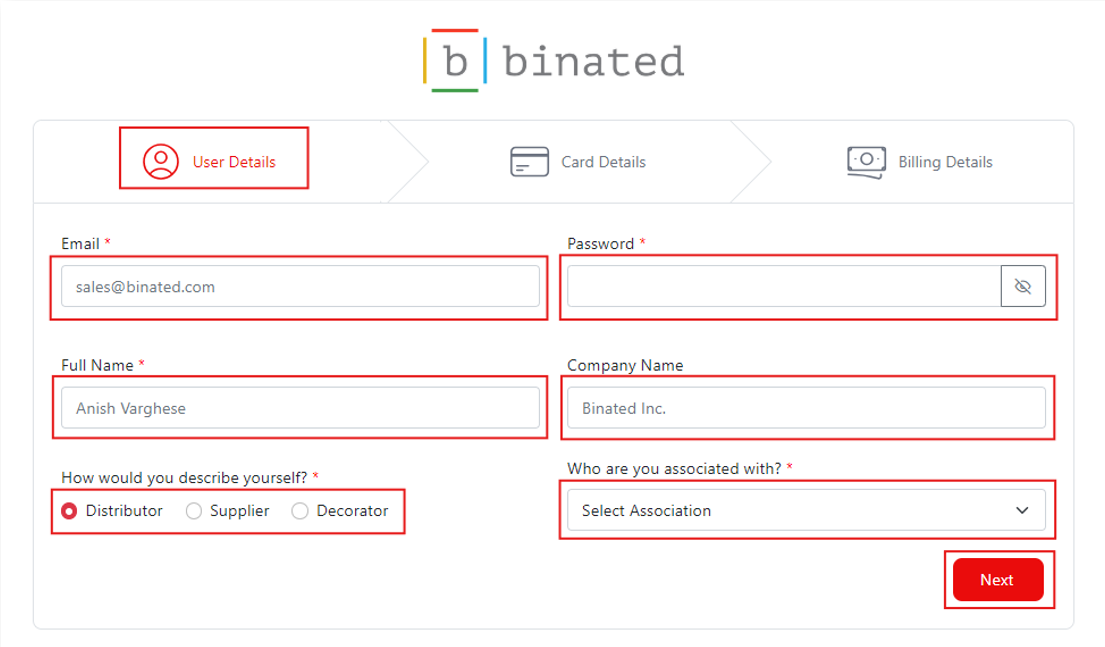
- Fill out the registration form with your business details:
In this section, we ask for key information to set up your account and personalize your experience. Please ensure all details are accurate, as they will be used for account verification, communication, and service customization.
- Email: Please enter a valid email address, as this will be used for account verification, system notifications, and important updates.
- Password: Create a strong password with a minimum of 8 characters, including at least one uppercase letter, one number, and one special character.
- Full Name: Enter your full name as it will appear on your account and any communications.
- Company Name: Provide your official company name, as this will be used for billing and service identification purposes.
-
How would you describe yourself?
- Distributor
- Supplier
- Decorator
- Please select the option that best describes your role.
-
Who are you associated with?
- Specify the organization or entity you are currently associated with. Use the option from the dropdown list available.
- Once done, click on the Next button.
Please provide your payment information to continue with your
registration.
Fill out the following fields with your card details:
- Card Number: Enter your 16-digit card number without spaces or dashes.
- Name on Card: Provide the name exactly as it appears on your credit or debit card.
- Expiry Month: Select the month your card expires (MM format).
- Expiry Year: Select the year your card expires (YYYY format).
- CVV Code: Enter the 3-digit security code located on the back of your card.
- Once done, click on the Next button.

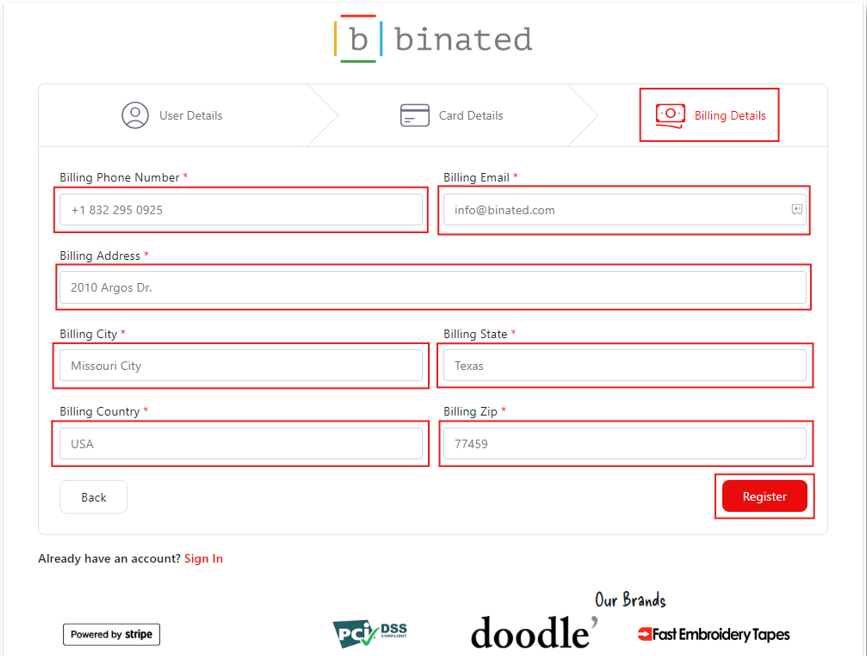
Please provide your billing information to ensure accurate invoicing and
seamless order processing. Ensure all details match your payment method
to avoid any delays.
Fill out the following fields with your billing
details:
- Billing Phone Number: Enter a valid phone number where you can be reached regarding your billing inquiries.
- Billing Email: Provide an email address where billing statements and receipts will be sent. This may be the same as your registration email.
- Billing Address: Enter the complete street address associated with your billing information.
- Billing City: Provide the city where your billing address is located.
- Billing State/Province: Enter the state or province corresponding to your billing address.
- Billing Country: Enter your country for your billing address.
- Billing Zip/Postal Code: Enter the postal code for your billing address.
- Once done, click on the Register button.
We understand that security is crucial. Rest assured, your information is protected by our PCI DSS-compliant payment gateway, ensuring your credit card details are encrypted and secure throughout the transaction process.
Your trust is essential to us, and we are dedicated to safeguarding your privacy and security every time you use our platform.
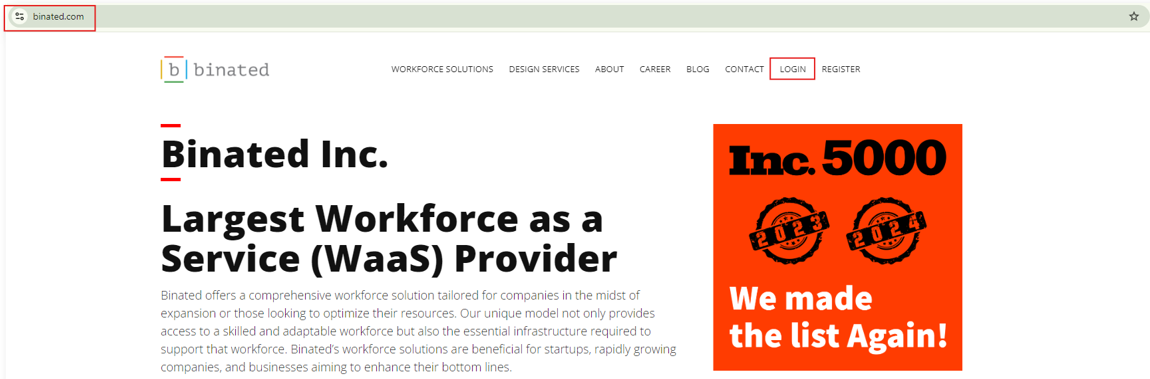
To access your binated.com account, follow these steps:
- Go to binated.com.
- Click the "Login" button located at the top-right corner of the homepage.
- Enter your registered email address and password in the respective fields.
- Click "Login" to access your dashboard and start using our services.

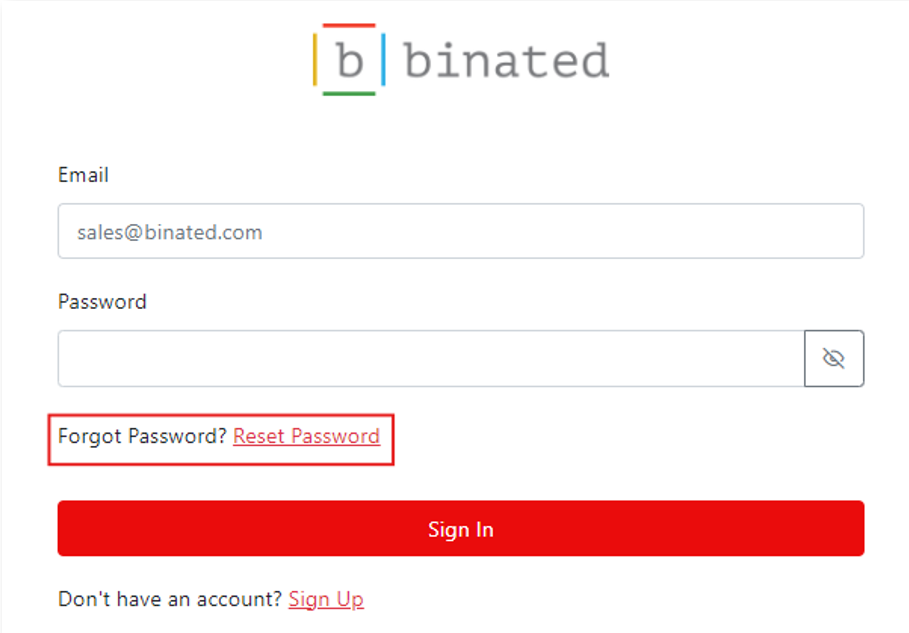
If you've forgotten your password, follow these simple steps to reset it:
- Go to binated.com homepage.
- Click on the "Login" button at the top-right corner.
- On the login page, click "Reset Password" below the password field.
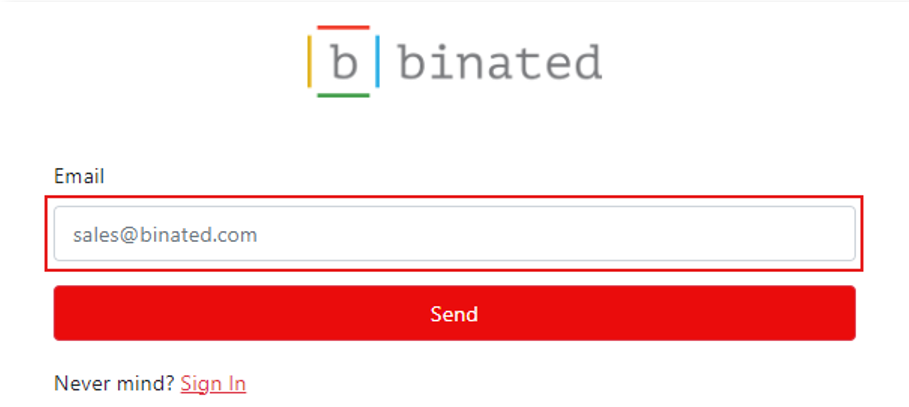
- Enter the email address associated with your account.
- Click "Send" to receive a password reset link in your email inbox.
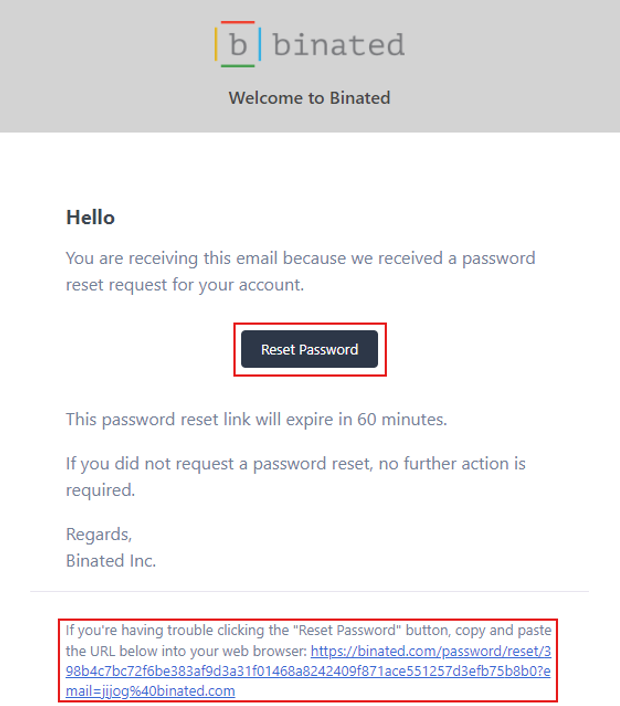
- Check your email and click the link provided in the reset email.
- Follow the prompts to create a new password. Make sure it’s strong and secure (minimum 8 characters, with at least one uppercase letter, one number, and one special character).
- Once updated, return to the login page and use your new password to access your account.
- If you don’t receive the email, please check your spam folder.
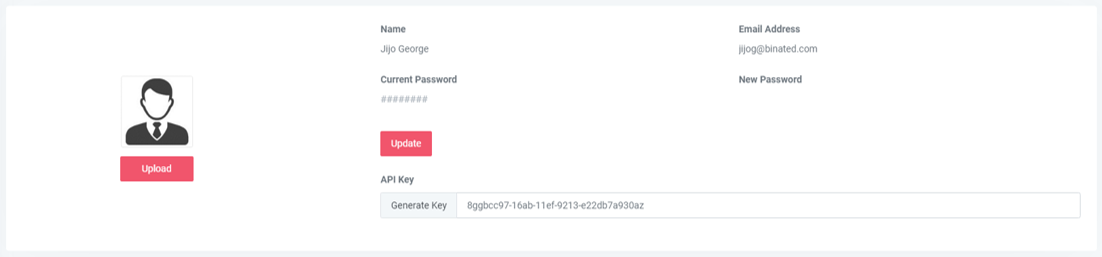
To change your password:
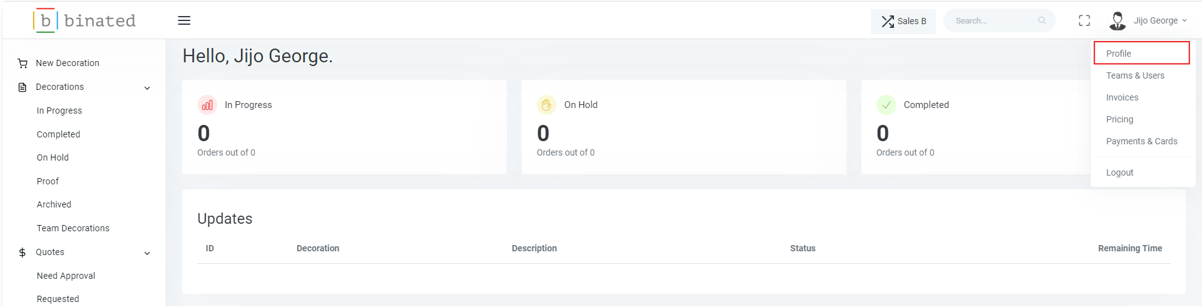
- Log in to your account.
- Navigate to your Profile present at the upper right of the screen.
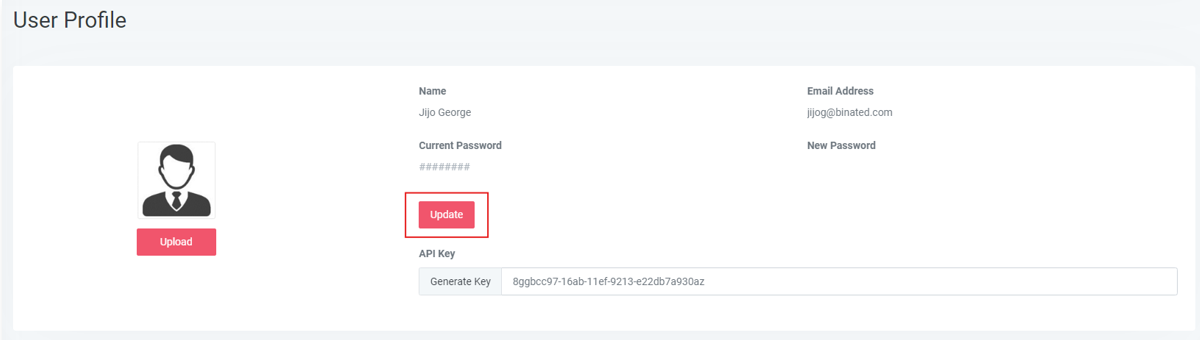
- This will open the User Profile page.
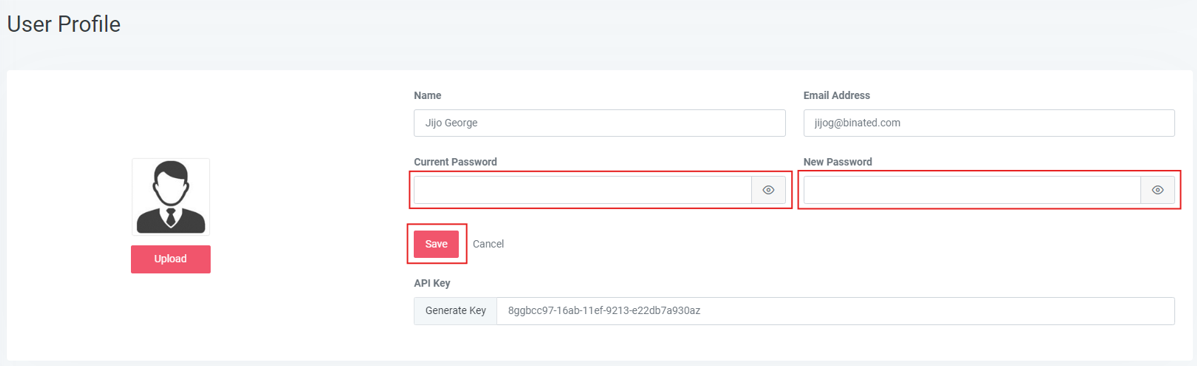
- Click on the Update button.
- Enter your current password, followed by your new password.
- Click "Save" to update your password.
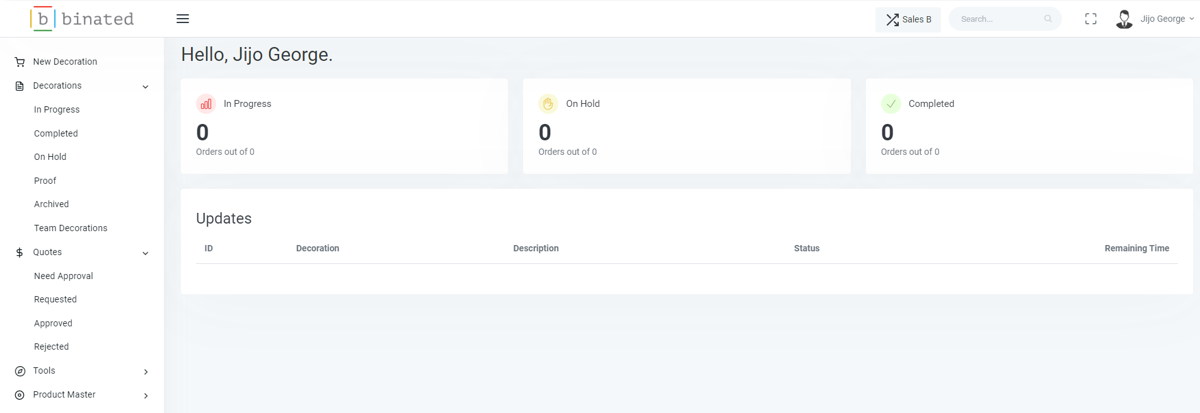 On the left side of the screen, you'll find a navigation ribbon with several key
options:
On the left side of the screen, you'll find a navigation ribbon with several key
options:
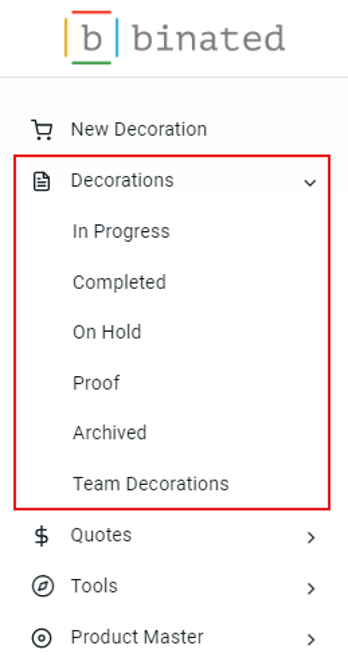
This section allows you to track your orders based on their status:
- In Progress: Displays all orders that are actively being worked on.
- Completed: Shows a list of all orders that have been finalized and completed.
- On Hold: Displays orders that are temporarily paused and awaiting further action.
- Proof: Lists orders that are in the proofing stage, requiring approval or revisions before moving forward.
- Archived: Find orders that have been completed and archived under this tab.
- Team Decoration: This section displays all decoration requests placed by different users within your team.
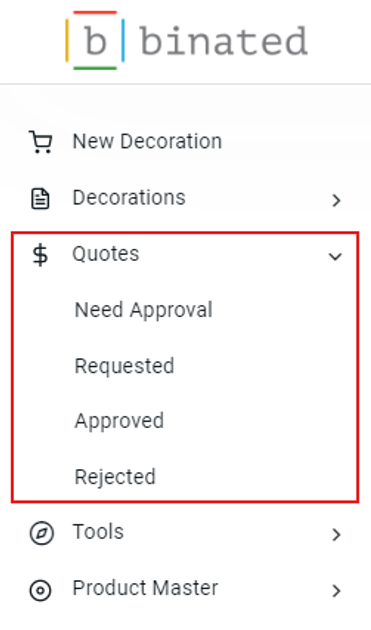
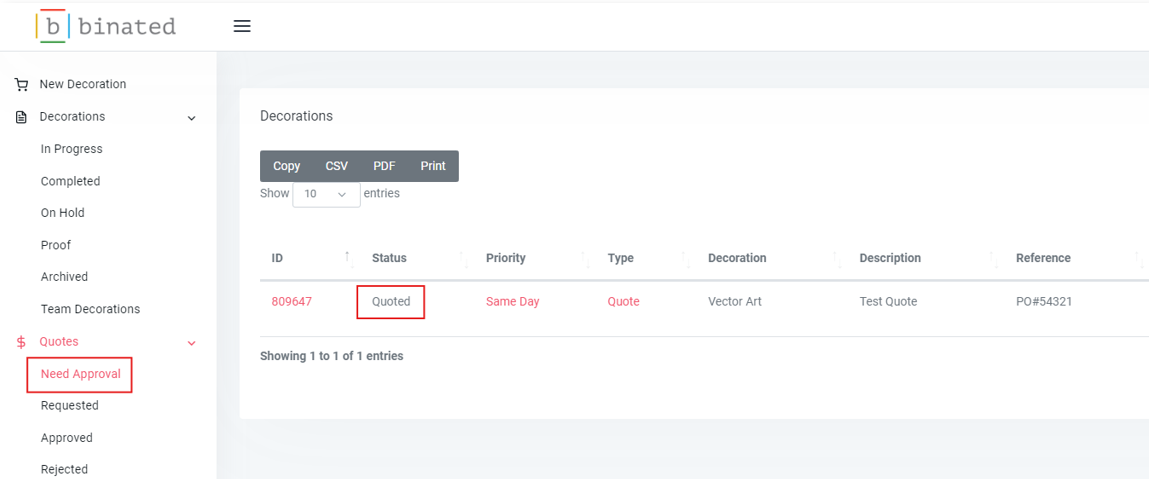
This section displays the different statuses of your quotes, providing you with an overview of their current state. Below are the details of each status:
- Need Approval: Quotes that require your approval before proceeding will be displayed here.
- Requested: View all quotes that you have submitted and are currently awaiting a response.
- Approved: This section shows all quotes that have been approved and are ready for the next steps.
- Rejected: Access quotes that have been rejected, along with any comments or reasons provided for the decision.
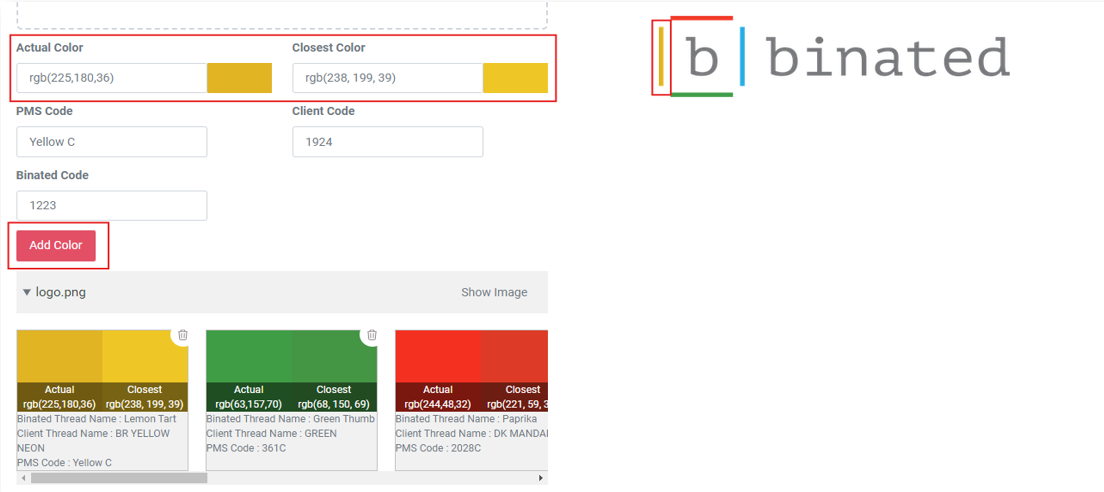
Use this tool to select and match colors for your designs, ensuring consistency and accuracy in your branding. Follow these steps:
- Drag and drop your image into the image area or
click to
upload a file from your device.
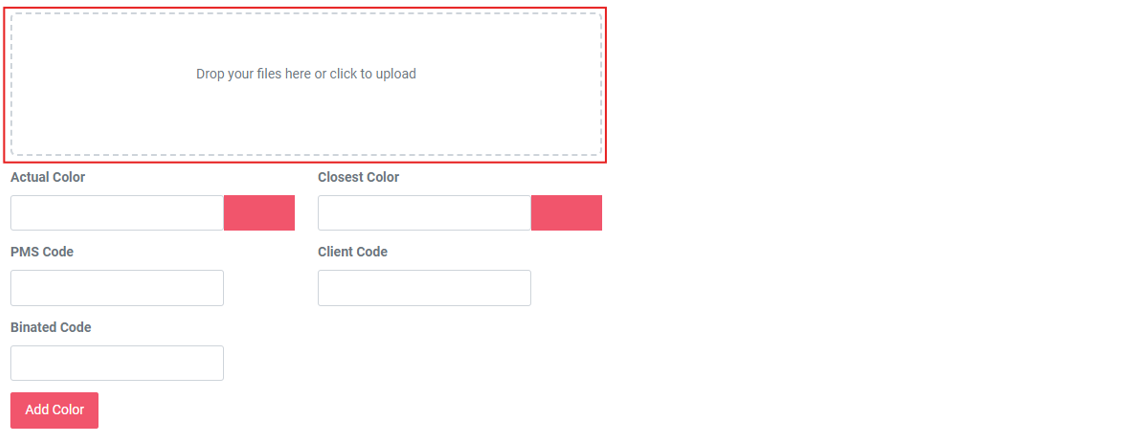
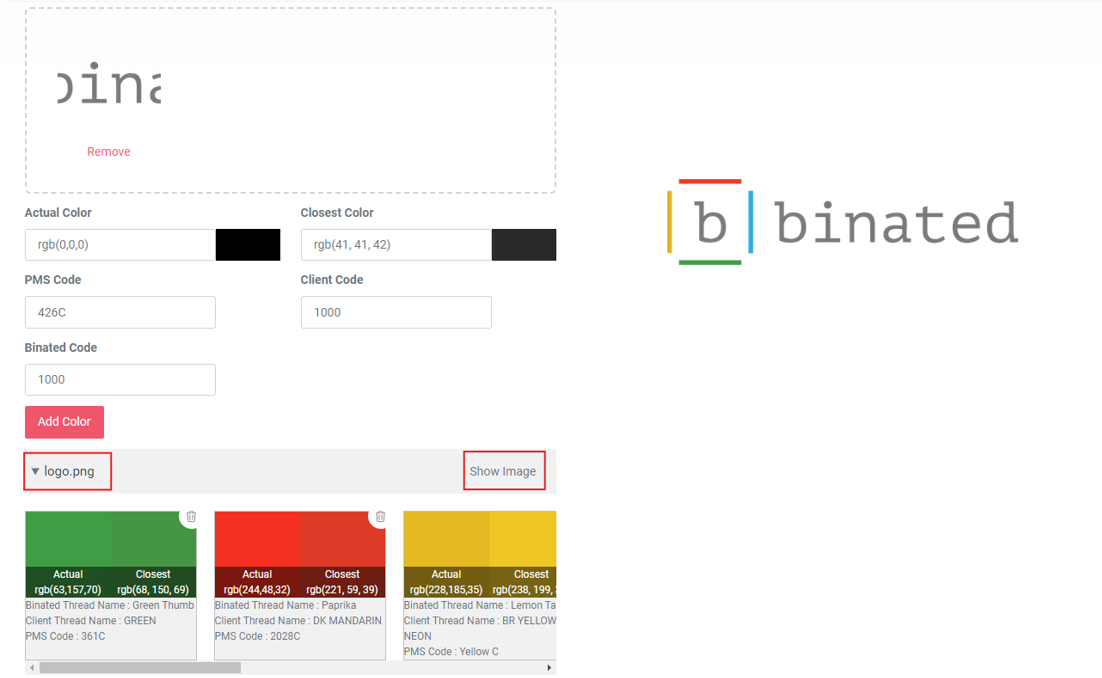
- Once the image is successfully loaded, scroll down, click the small triangle next to the image name, and select Show Image.
- The tool will display the RGB code, closest matching thread name, and PMS code.
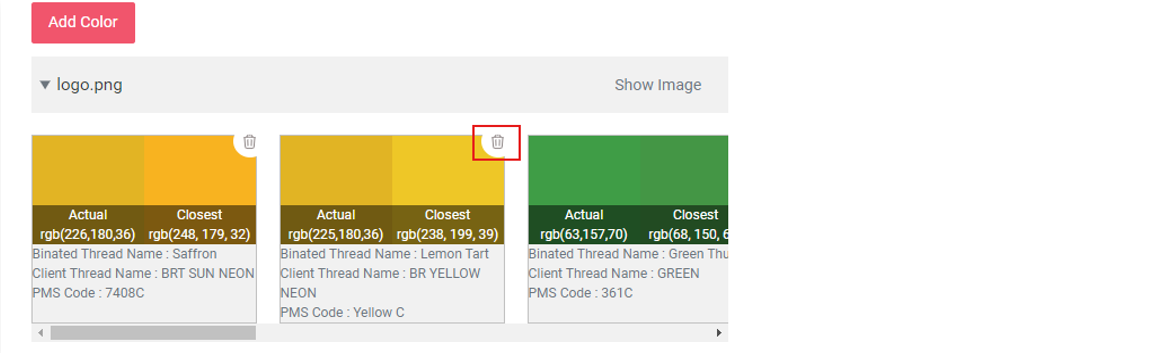
- You can also click on different elements in the logo to generate various shades and add them to the color bucket.
- Easily delete colors from the bucket by clicking the delete icon at the top-right corner of the color swatch.
- Once your desired colors are selected, you can directly place a decoration request by completing the following:
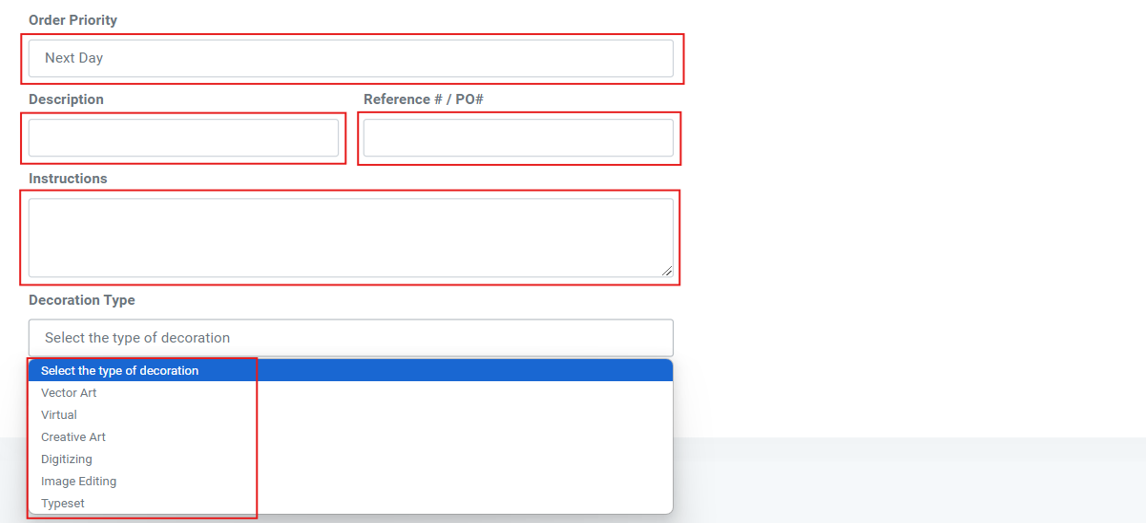
- Select the Order Priority from the drop-down.
- Add a Description to the design.
- Enter your Reference#/PO# for tracking and managing the order.
- Include any special instructions related to the order.
- Select the desired Decoration Type from the drop-down list.
- Click the Submit button to place your order. It will appear under the In Progress section in the Decorations tab.
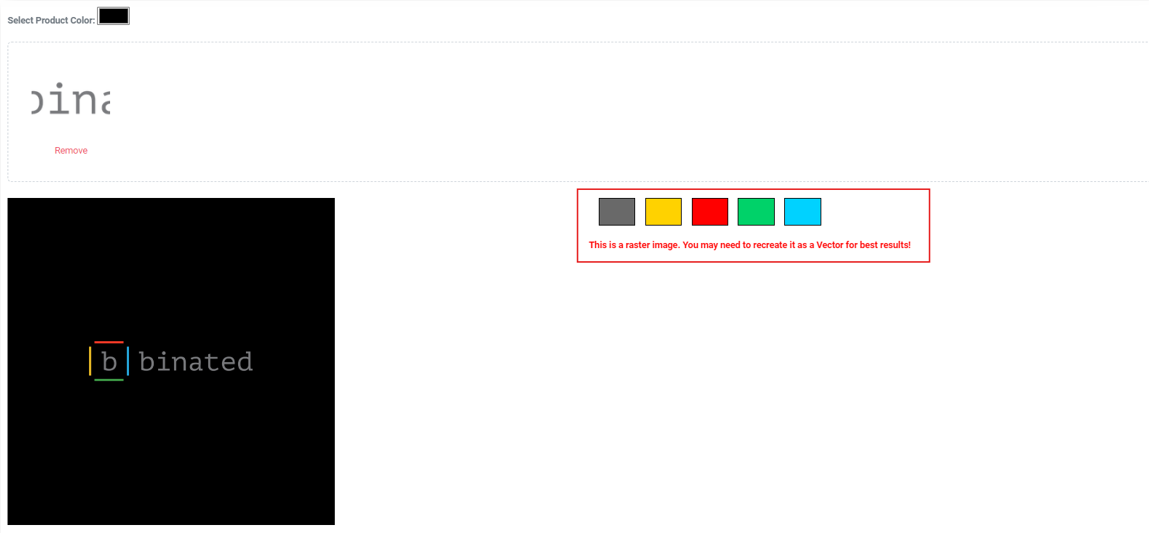
This tool allows you to configure your design specifications and product options, making it simple to customize your order. Follow these steps to use the tool:
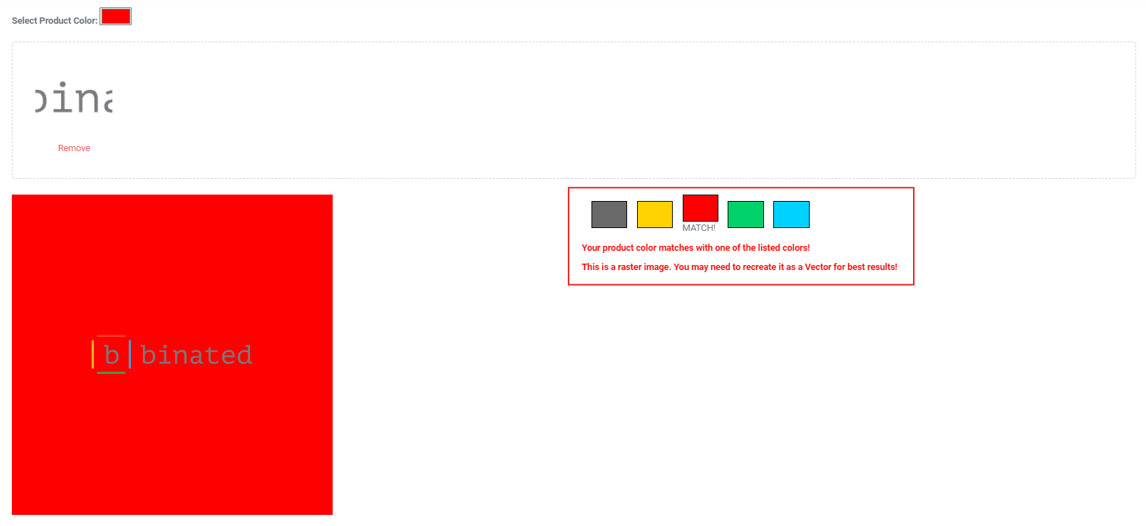
- Choose the color of the product where your branding will be applied.
- Drag and drop your logo into the image area or click to upload a file from your device.
- Instantly view a preview of how your logo will appear on the product. The tool will display the colors used in your logo and identify whether the uploaded file is a vector or raster format.
- If any color in your logo matches the product color, the tool will notify you to ensure your branding stands out clearly.
Get an instant estimate of costs for your design projects. Simply input your design details, and this tool will provide a quick price estimate, helping you plan your budget.
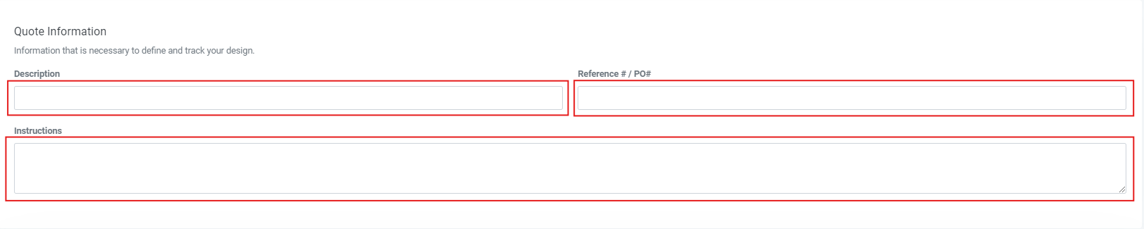
- Under the Quote Information section, enter the Description of your design, along with the Reference#/PO#, and any specific Instructions related to the design request.
- Under the Design Estimator section, enter the details based on the fields.
- Toggle Remove Background if you want to eliminate the background from the image you’ll be uploading for the estimate.
- Select the Unit of Measurement (mm, cm, or inches) using the radio buttons.
- Enter the Height, Width, and your Price per 1000 stitches (available in the Pricing section of your account).
- Check the agreement box to confirm you want to proceed with this estimate.
- Once complete, click Estimate Design to generate the estimate.
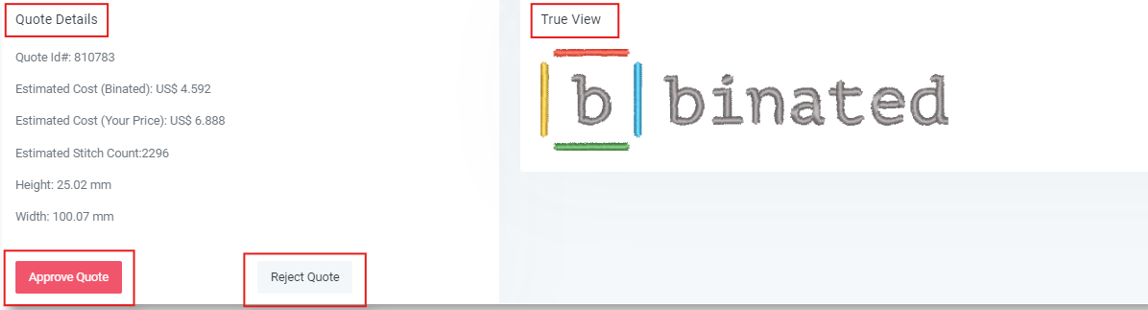
- The tool will provide you with the detailed Quote Information and a True View of your design.
- You then have the option to either Approve Quote, which will place the order into the system and allow you to view it in the Decorations section, or Reject Quote if you choose not to proceed.

This tool allows you to create designs for your entire team with ease. For example, you can use it for name drops, where a common logo is applied to all products, but each item is personalized with individual team members' names. While traditionally a time-consuming task, the Team Designer tool simplifies the process, allowing you to generate customized designs for your team in just minutes. Follow the below steps to use this tool:
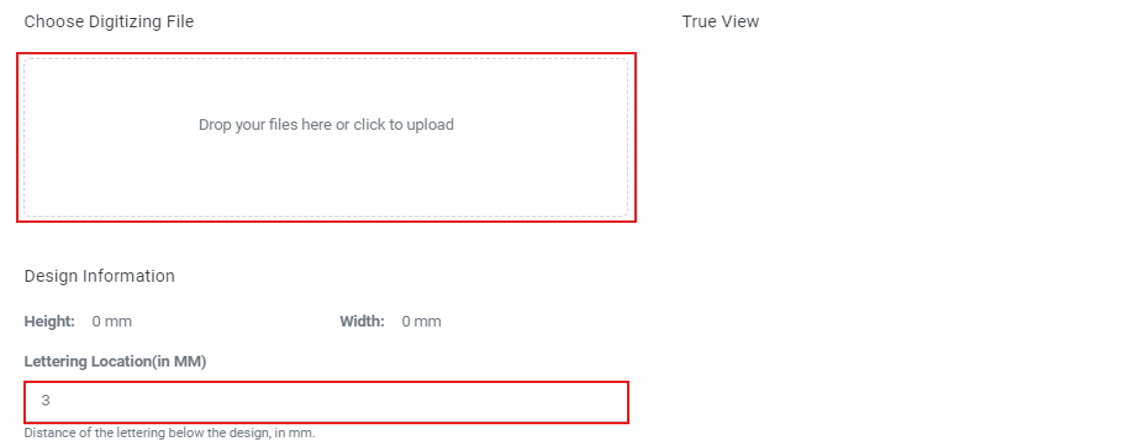
- Choose Digitizing File: Drag and drop your digitizing file into the designated file section. (This must be an .EMB file)
- Lettering Location: Enter this size in mm. This determines the distance of the lettering from the logo.
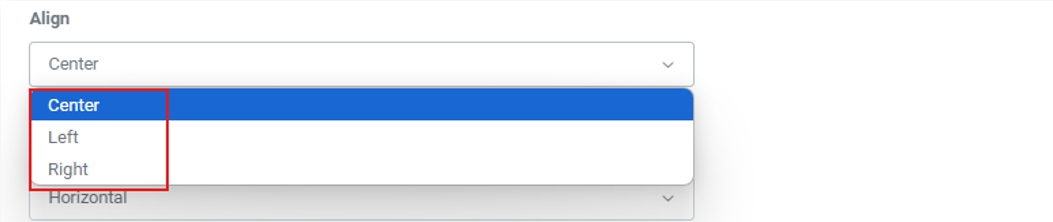
- Align: Choose the desired alignment from the drop-down list.
- Baseline: Select the baseline orientation for the lettering from the drop-down list.
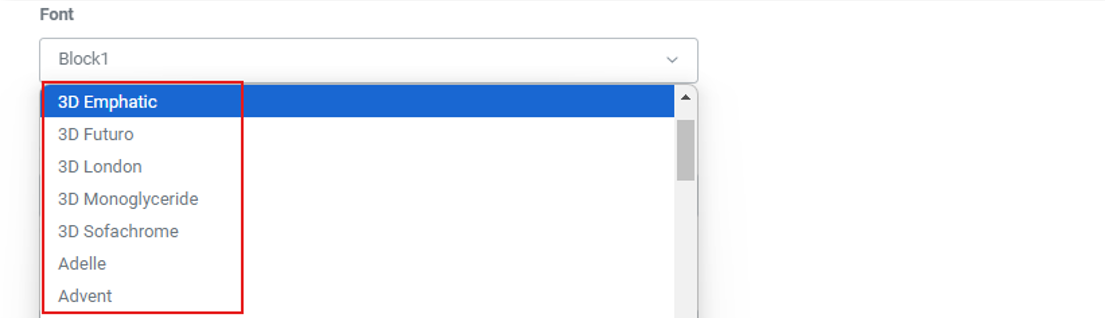
- Font: Choose the font you want to use from the available list.
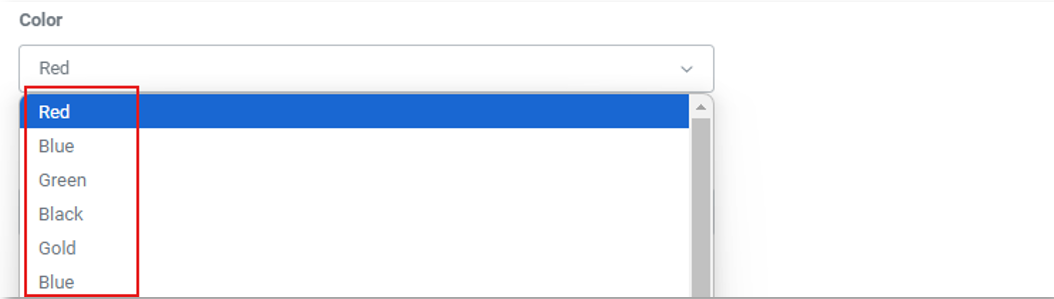
- Color: Select the color of the lettering from the list provided.
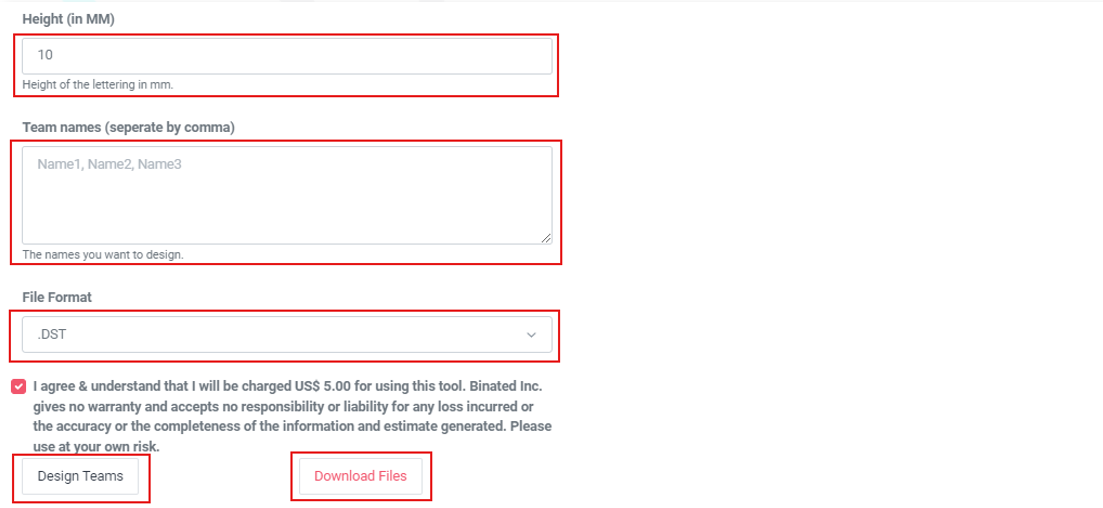
- Height: Specify the height of the lettering required in mm.
- Team Names: Enter the names of all the team members, separated by commas.
- File Format: Choose the desired file format for the output file.
- Confirm Agreement: Check the agreement box to confirm you want to proceed with the design.
- Design Teams: Click on this button to proceed with creating the designs.
- Download Files: Click on this button to download the output files that are generated.


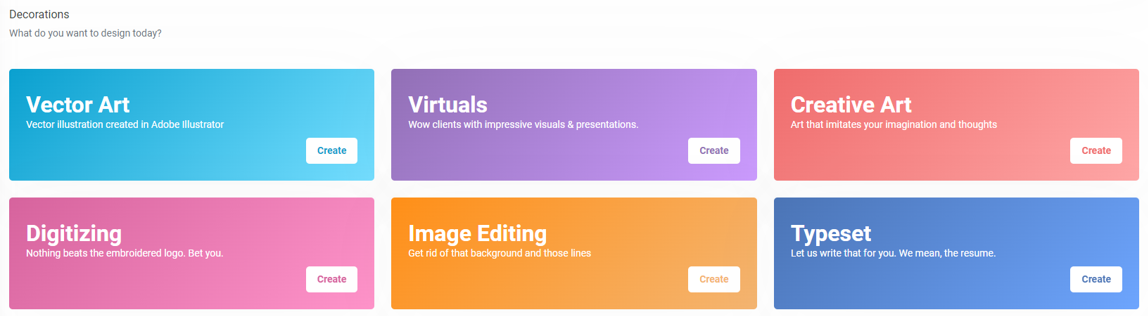
Vector Art
We convert your designs into high-quality vector files, ensuring crisp and scalable artwork for any print or decoration process.
Virtual
Get a realistic mock-up of your design on the actual product before finalizing your order, allowing you to visualize the finished look.
Creative Art
Our skilled design team brings your ideas to life with custom creative artwork tailored to your branding needs.
Digitizing
We convert artwork into stitch files for embroidery, ensuring accurate and detailed embroidery designs.
Image Editing
Enhance and retouch your images for better quality and presentation, making sure they are print-ready.
Typeset
We offer professional typesetting services, ensuring your text and fonts are formatted perfectly for promotional products.
Follow these steps to place a quote request for our design or decoration services:
- Log in to your account with your registered email and password.
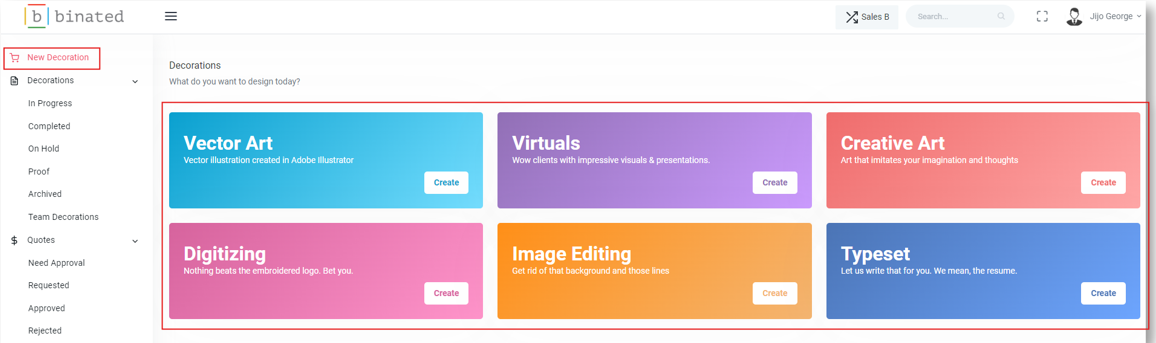
- Navigate to the New Decoration section on your Dashboard.
- Select the service you need a quote for, such as Vector Art, Digitizing, Image Editing, etc.
- This will open the order form, where you can fill in all the required details.
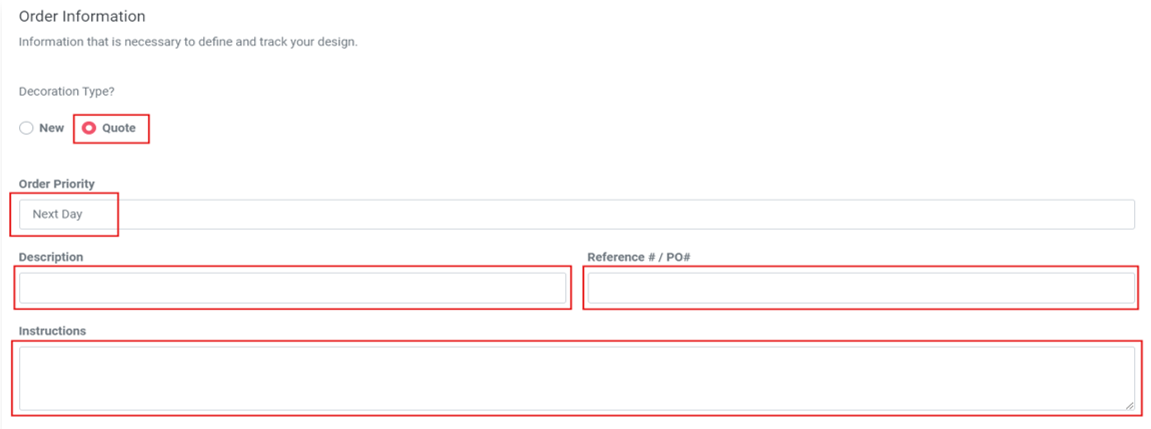
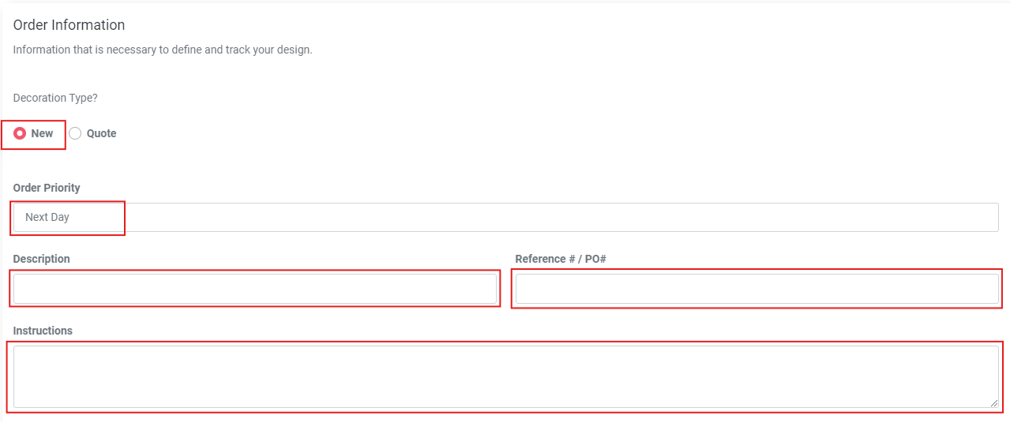
Information Necessary to Define and Track Your Design
- Under the Order Information section, select the Decoration Type as Quote.
-
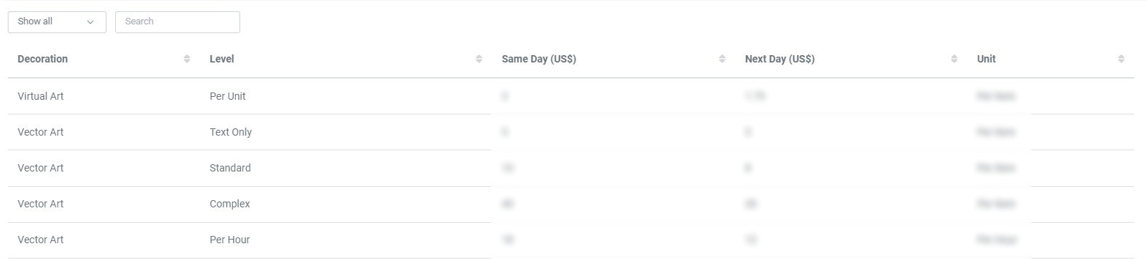
Order Priority can be selected from the dropdown list:
- Same Day: Get your order processed and completed on the same day for urgent requests, ensuring fast delivery without compromising quality.
- Next Day: Have your order prioritized for the next business day, allowing quick turnaround for time-sensitive projects.
- Custom: Choose a specific delivery date based on your project needs. This flexible option allows you to set a custom timeline that works for you.
- Description: Here you can enter an appropriate description of your design.
- Reference# / PO#: Enter your internal reference number or purchase order (PO) number to help track and manage this specific order request.
- Instructions: Include any special instructions related to the order.
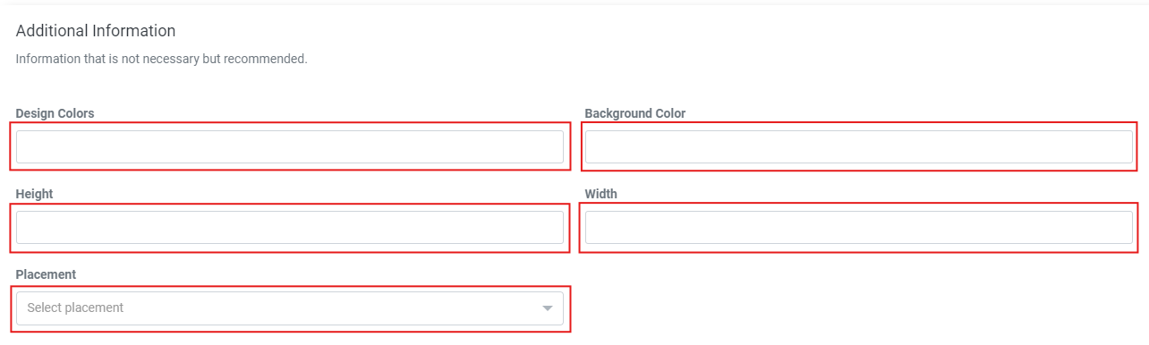
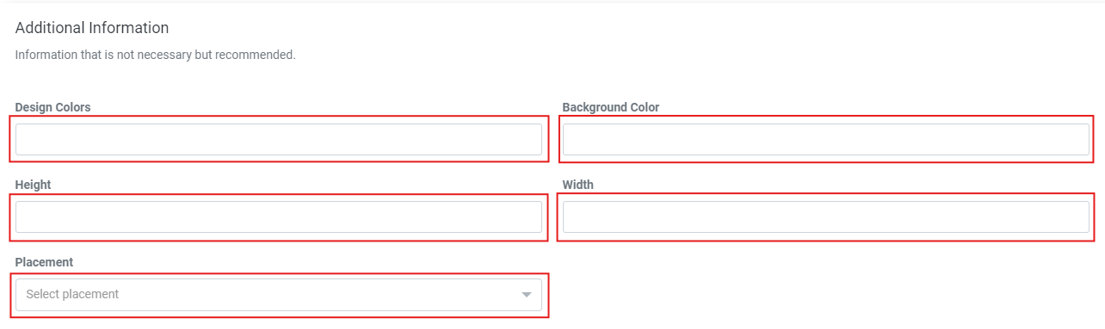
While not required, providing the following details is highly recommended to ensure the best results for your design.
- Design Color: Specify the primary colors used in your design to ensure accurate reproduction.
- Background Color: Indicate the background color to ensure your design stands out appropriately.
- Height: Provide the height dimensions of your design to match your preferred size.
- Width: Enter the width of your design for proper scaling and placement.
- Placement: Specify where the design should be placed on the product (e.g., center, top-left corner, etc.). You can select the value from the drop-down list.
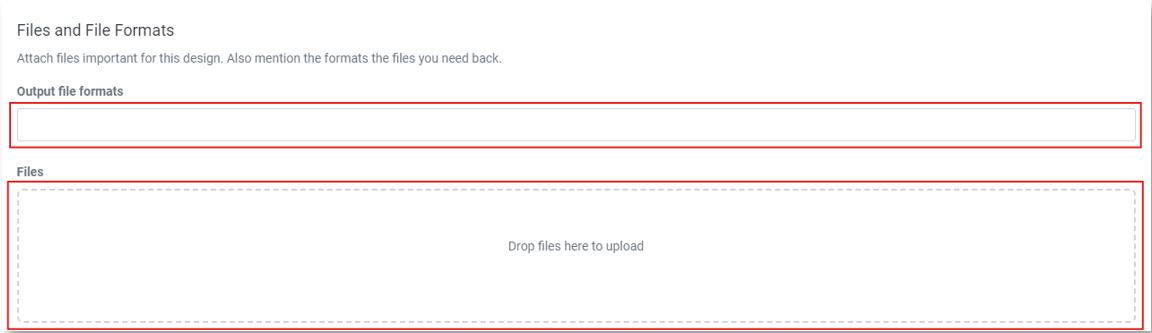
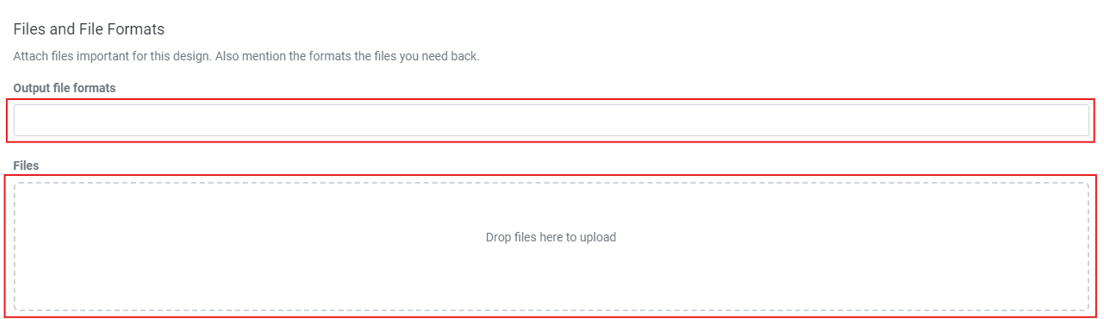
Attach files important for this design. Also mention the formats the files you need back.
- Output File Formats: Specify the formats you require for the final design (e.g., AI, EPS, PDF, PNG, JPG) based on your intended use or printing needs.
- Files: Upload any relevant files for your design, such as artwork, logos, or images. Ensure they are in high-resolution and supported formats (e.g., AI, PSD, PDF) to avoid any loss of quality.
- Submit Order: Once all the details are filled in, click on the Submit Order button that is present at either the top or the bottom of the page.
- Email Notification: This will also send an email notification to your registered email address with the order# generated.
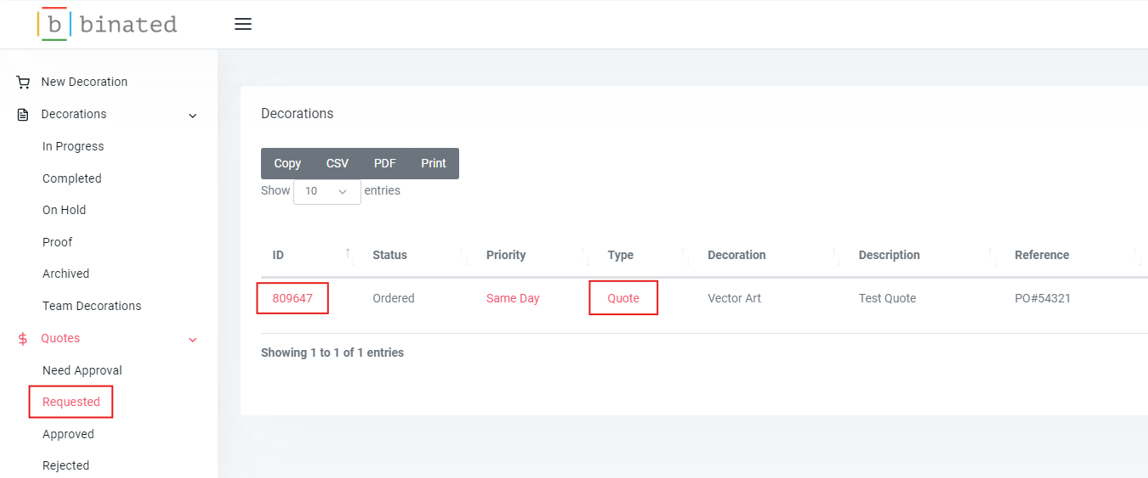
- After you submit a quote request, it will appear in the Requested stage under the Quotes section.
- Once our team reviews and processes the quote, it will be routed to you for approval. You can easily find the request under the Need Approval stage, allowing you to promptly review and confirm the details.
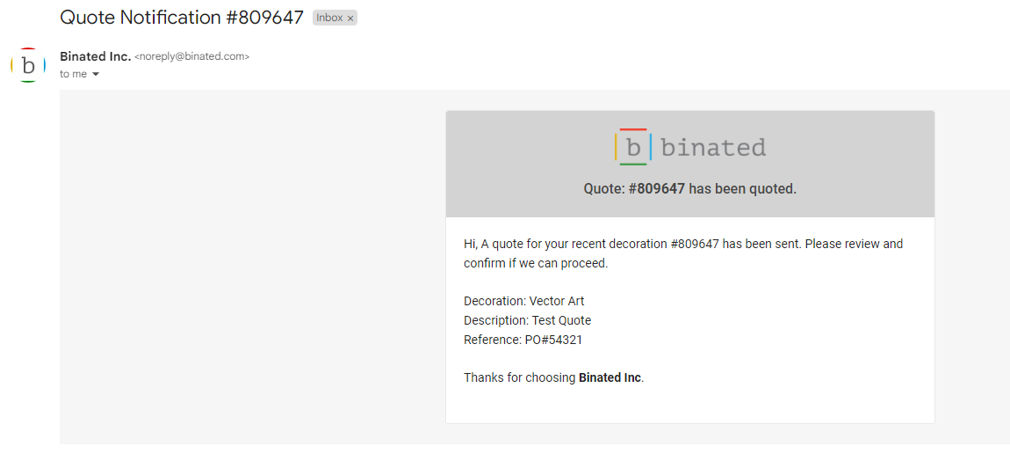
- You will also be receiving an email notification saying that the order has been quoted.
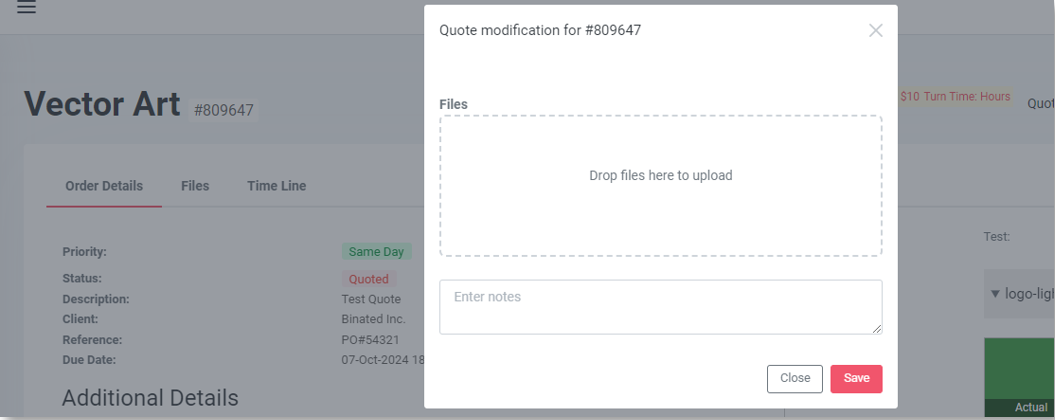
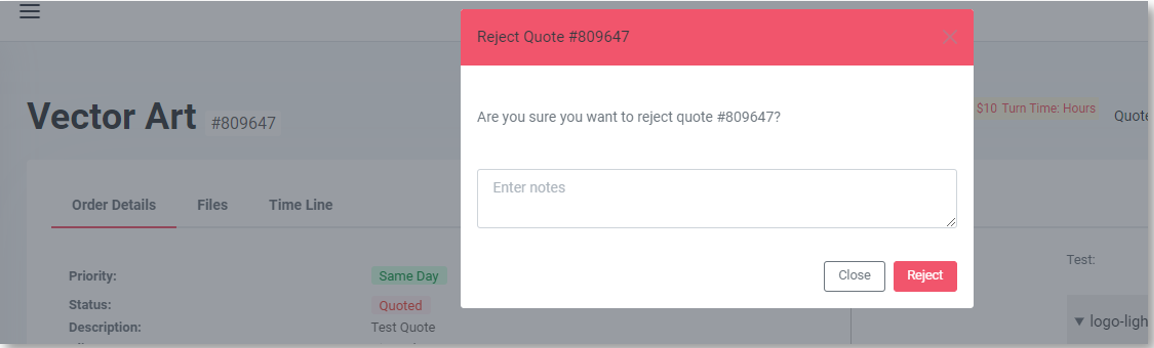
- Now, open the order by clicking on the ID#.
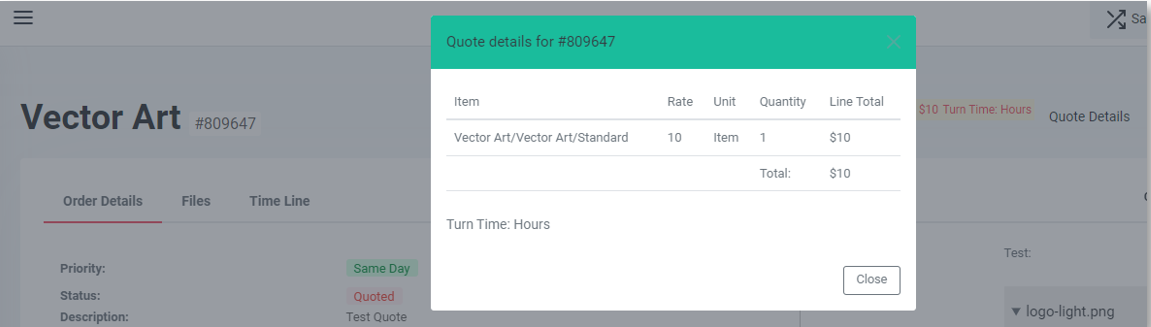
- On the right side of the page, you will see these options:
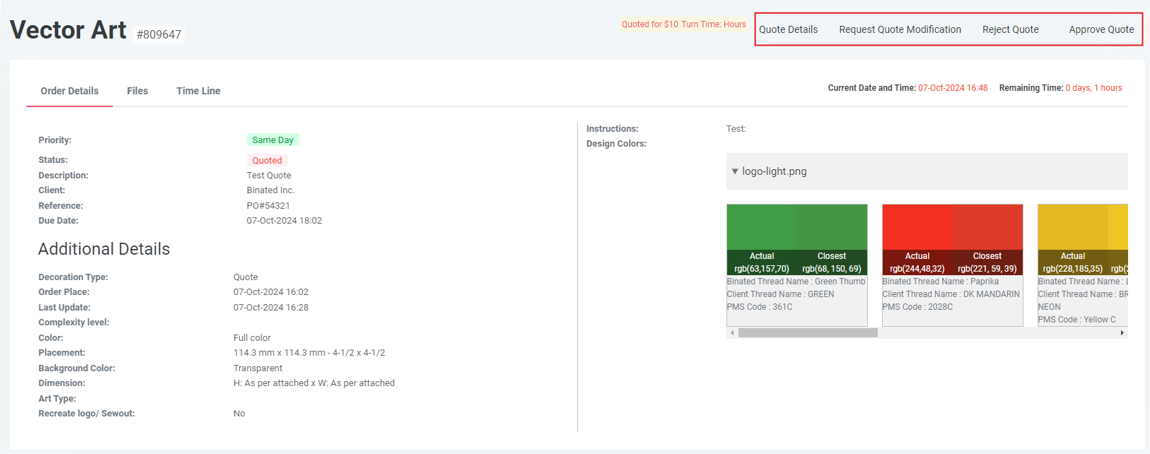
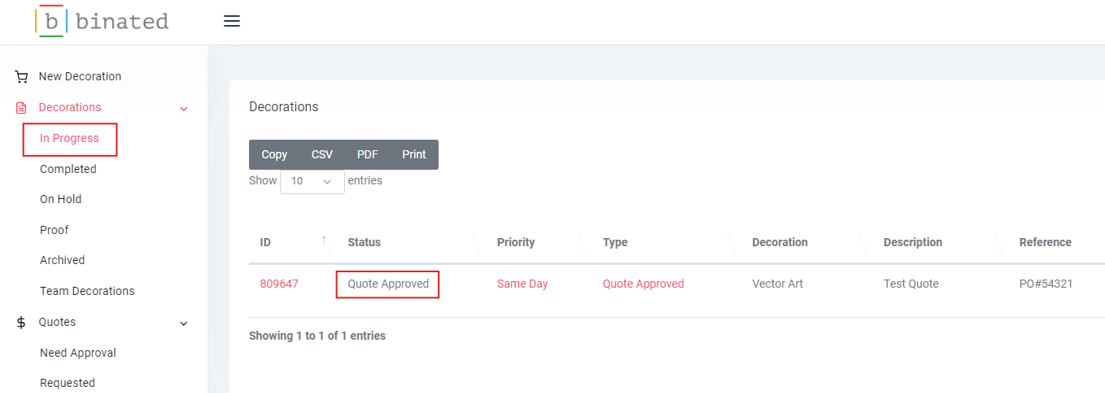
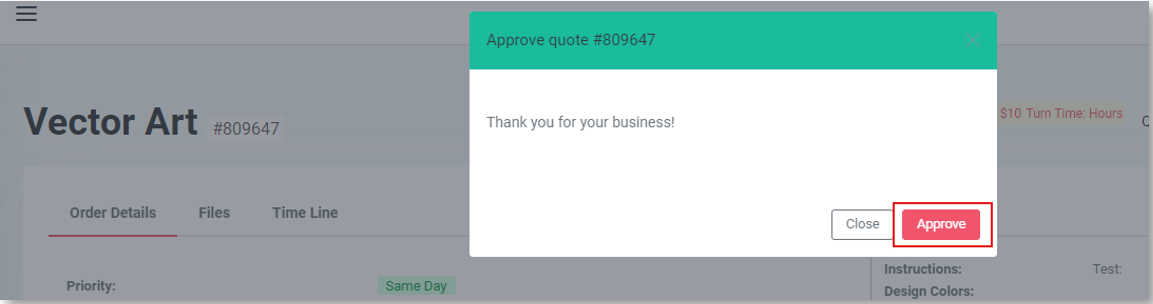 Clicking on the Approve button will convert this request into an Order and
the progress of the order can be seen in the Decorations section.
Clicking on the Approve button will convert this request into an Order and
the progress of the order can be seen in the Decorations section.
Follow these steps to place a quote request for our design or decoration services:
- Log in to your account with your registered email and password.
- Navigating to the New Decoration section on your Dashboard.
- Select the service you need a quote for (e.g., Vector Art, Digitizing, Image Editing, etc.).
- This will open the order form; now fill in all the required details.

Information Necessary to Define and Track Your Design
- Under the Order Information section, select the Decoration Type as New.
-
Order Priority can be selected from the dropdown list:
- Same Day: Get your order processed and completed on the same day for urgent requests, ensuring fast delivery without compromising quality.
- Next Day: Have your order prioritized for the next business day, allowing quick turnaround for time-sensitive projects.
- Custom: Choose a specific delivery date based on your project needs. This flexible option allows you to set a custom timeline that works for you.
- Description: Here you can enter an appropriate description of your design.
- Reference# / PO#: Enter your internal reference number or purchase order (PO) number to help track and manage this specific order request.
- Instructions: Include any special instructions related to the order.
While not required, providing the following details is highly recommended to ensure the best results for your design:
- Design Color: Specify the primary colors used in your design to ensure accurate reproduction.
- Background Color: Indicate the background color to ensure your design stands out appropriately.
- Height: Provide the height dimensions of your design to match your preferred size.
- Width: Enter the width of your design for proper scaling and placement.
- Placement: Specify where the design should be placed on the product (e.g., center, top-left corner, etc.). You can select the value from the drop-down list.
Attach files important for this design. Also mention the formats the files you need back:
- Output File Formats: Specify the formats you require for the final design (e.g., AI, EPS, PDF, PNG, JPG) based on your intended use or printing needs.
- Files: Upload any relevant files for your design, such as artwork, logos, or images. Ensure they are in high-resolution and supported formats (e.g., AI, PSD, PDF) to avoid any loss of quality.
- Once all the details are filled in, click on the Submit Order button that is present either at the top or the bottom of the page.
- This will also send an email notification to your registered email address with the generated order#.
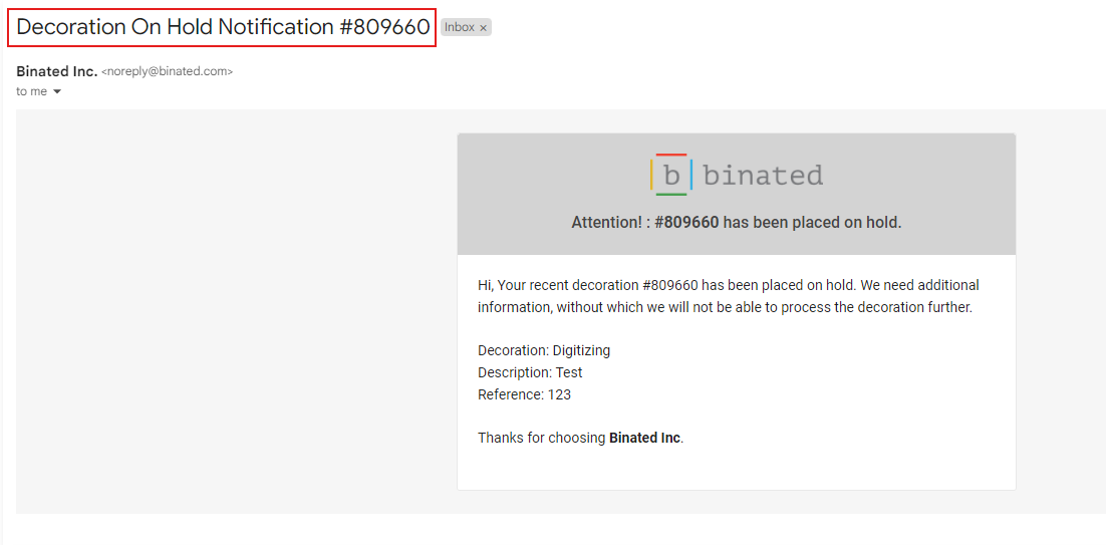
- If the order you placed has any missing information or our team requires confirmation to proceed, the order will be placed on hold for further assistance.
- You will also receive an email notification stating that the Decoration you requested is on Hold.
- Follow the steps below to review the reason and resolve the order from hold.
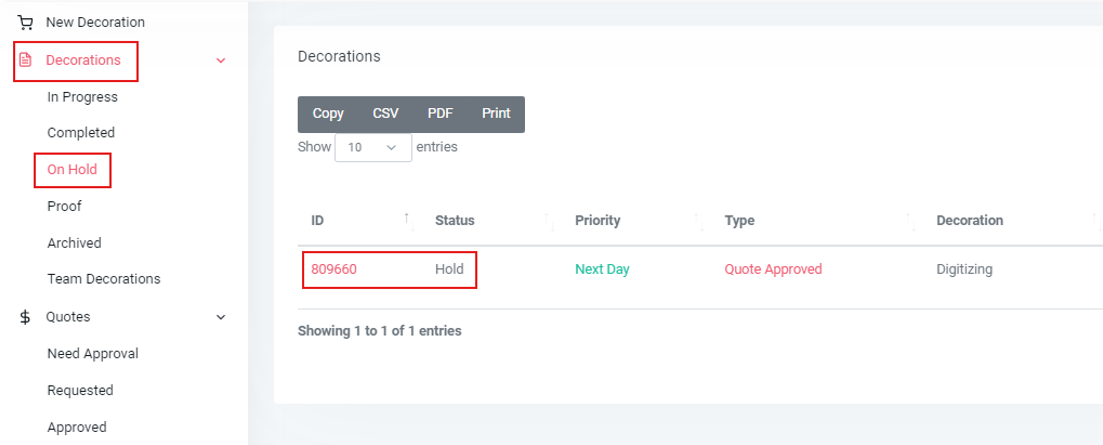
- Go to the On Hold section under the Decorations tab on your dashboard.
- Click on the order to review the details and identify the reason for the hold.
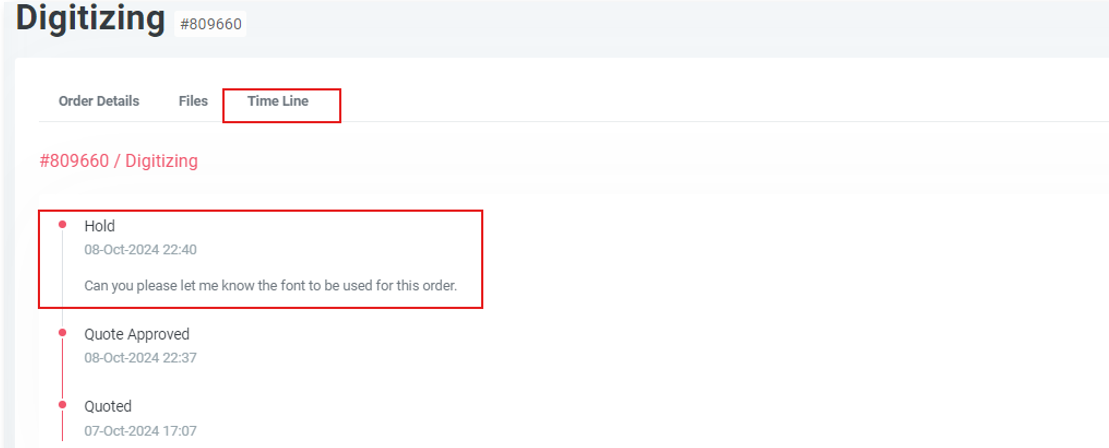
- This will open the order, and under the Order Details tab, check the On Hold Description section; this will let you know the reason behind placing the order on hold.
- You can also see the hold description under the order Timeline.
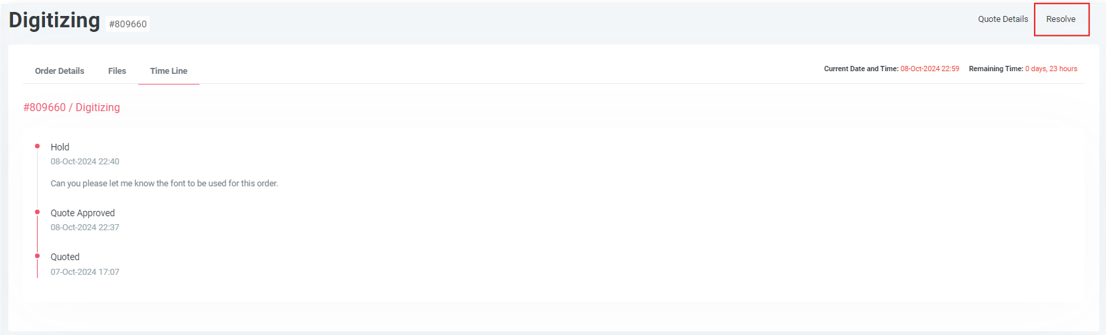
- Once you have the required information, you can resolve the order by clicking on the Resolve button present at the top right of the page.
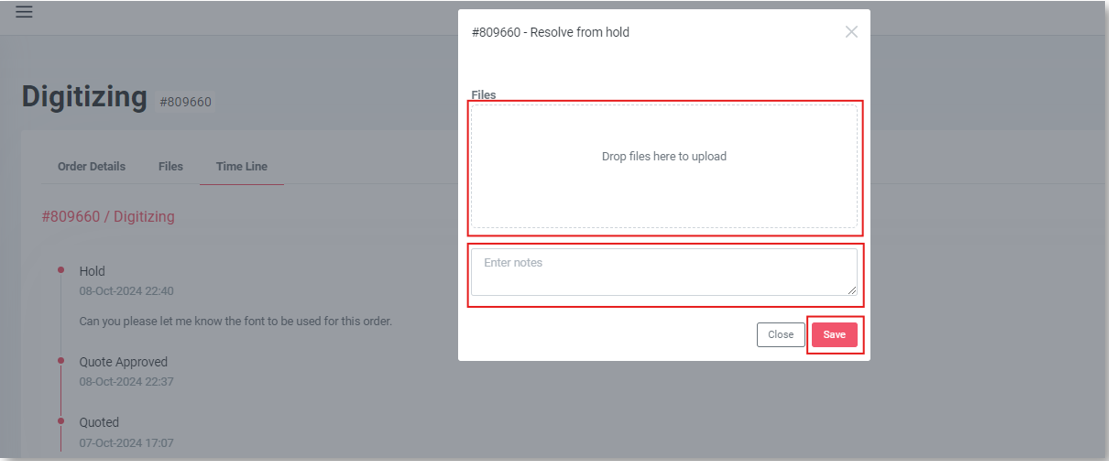
- This will open a pop-up window where you can drag and drop or upload any reference file required and enter the comments to resolve the order from hold.
- Once done, click on the save button and the order will be resolved from hold.
- If needed, contact the support team via email for assistance in resolving the hold.
- You can view the live update of the order under the In Progress section to ensure the order resumes processing smoothly.

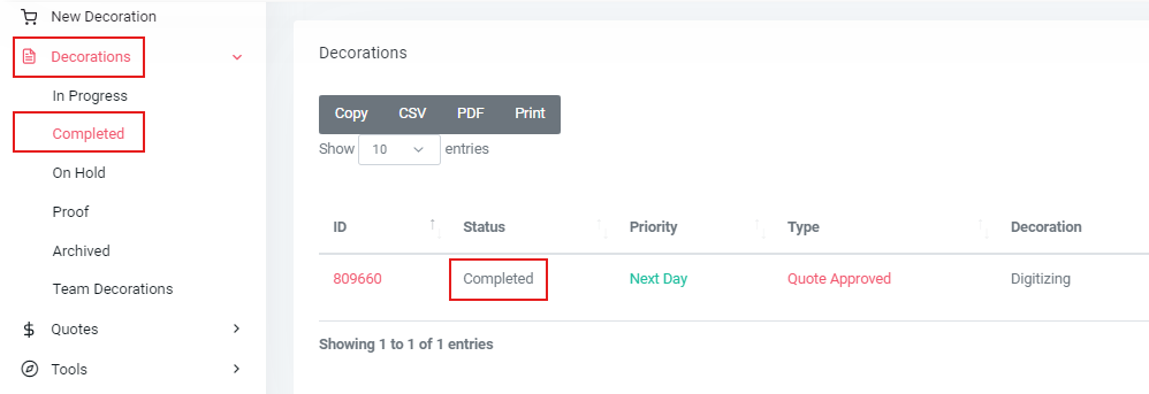
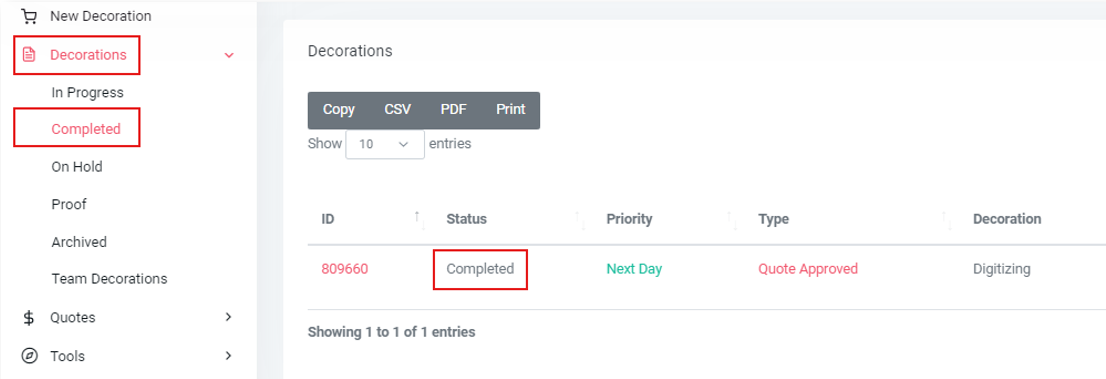
- Once the order is processed and delivered from our end, the status of the order will be changed to Completed.
- To view or retrieve the output files, go to the Decorations Tab. After logging in, navigate to the Decorations tab on your dashboard.
- Click on the Completed tab. This will display a list of all orders that have been finalized.
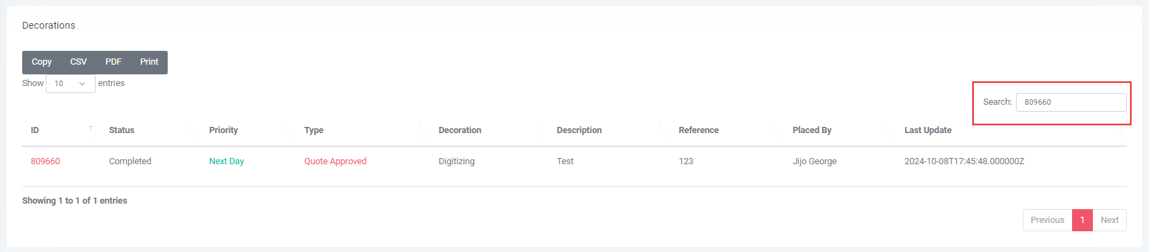
- You can search for specific orders by using the search bar to find the order you need.
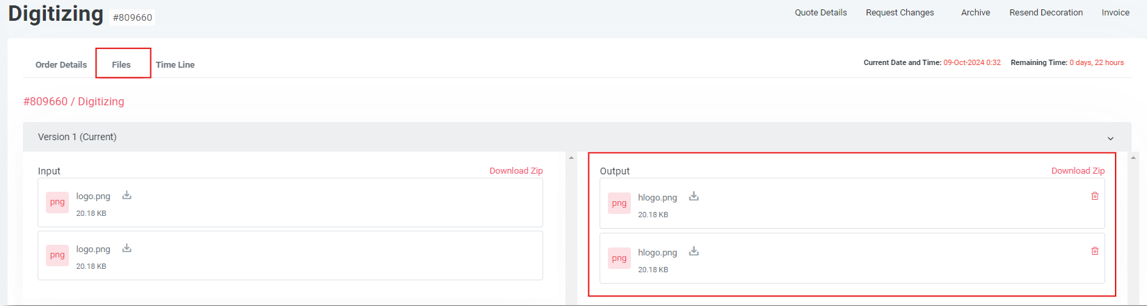
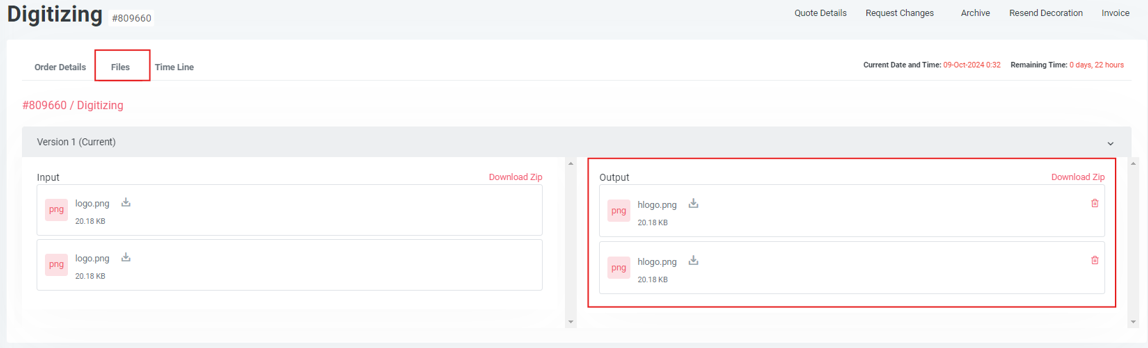
- Click on the order to view its details, go to the Files tab, and click on the Download Zip option to download all the files created for this order, or you can individually download the files by clicking on the download icon.
- If needed, you can archive the order for future reference or place a revision request in case of any changes.
- Once the order is processed and delivered from our end, the status of the order will be changed to Completed.
- To view or retrieve the output files, go to the Decorations Tab. After logging in, navigate to the Decorations tab on your dashboard.
- Click on the Completed tab. This will display a list of all orders that have been finalized.
- You can search for specific orders by using the search bar to find the order you need.
- Click on the order to view its details, go to the Files tab, and click on the Download Zip option to download all the files created for this order, or you can individually download the files by clicking on the download icon.
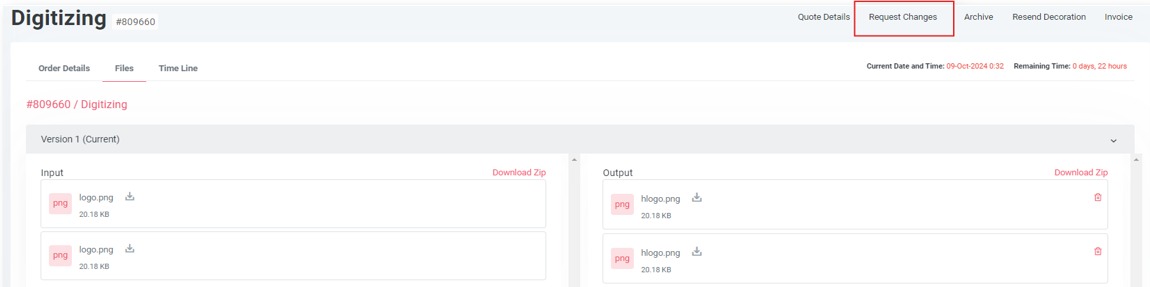
- On reviewing the output files, if you need to make changes to the design, use the Request Changes option that is present on the order page.
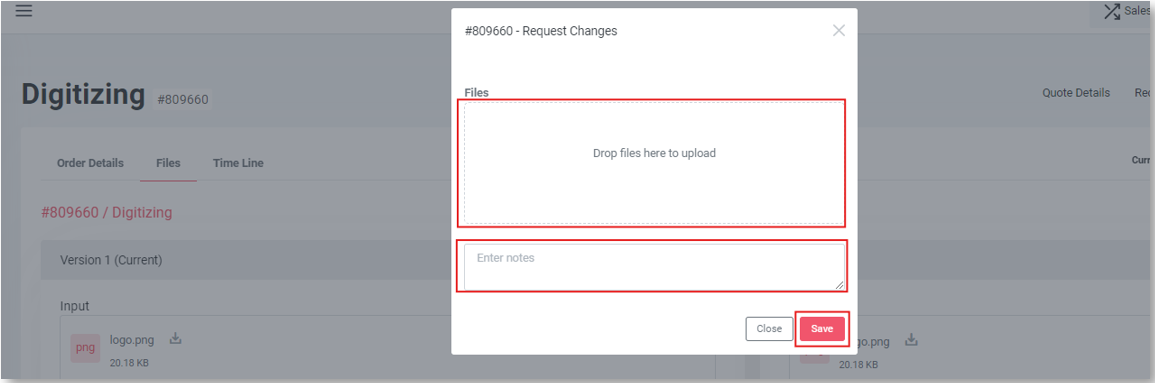
- This will open a pop-up window, where you can drag and drop or upload any reference image for carrying out the revision, and you can enter any notes referring to the changes.
- Once done, click on the save button, and this will create a revision order in the system that can be viewed in the In Progress stage under the Decorations section.